Starting my own garden
As I’ve gotten older, I’ve realized just how special it is to have a garden. I have vivid memories as a kid running into my grandparent’s backyard and snacking on the sweetest raspberries or grabbing green beans from the garden in my backyard. Nothing could beat the taste of those treats straight from the garden.
But it’s not always feasible for people to grow their own crops. I’ve lived in small apartments with no access to a yard for so long, so I had to rely on grow lights. It got the job done, but I anxiously waited for the moment when I could great an actual garden in my backyard. And finally, I could do it this year.
The Bed
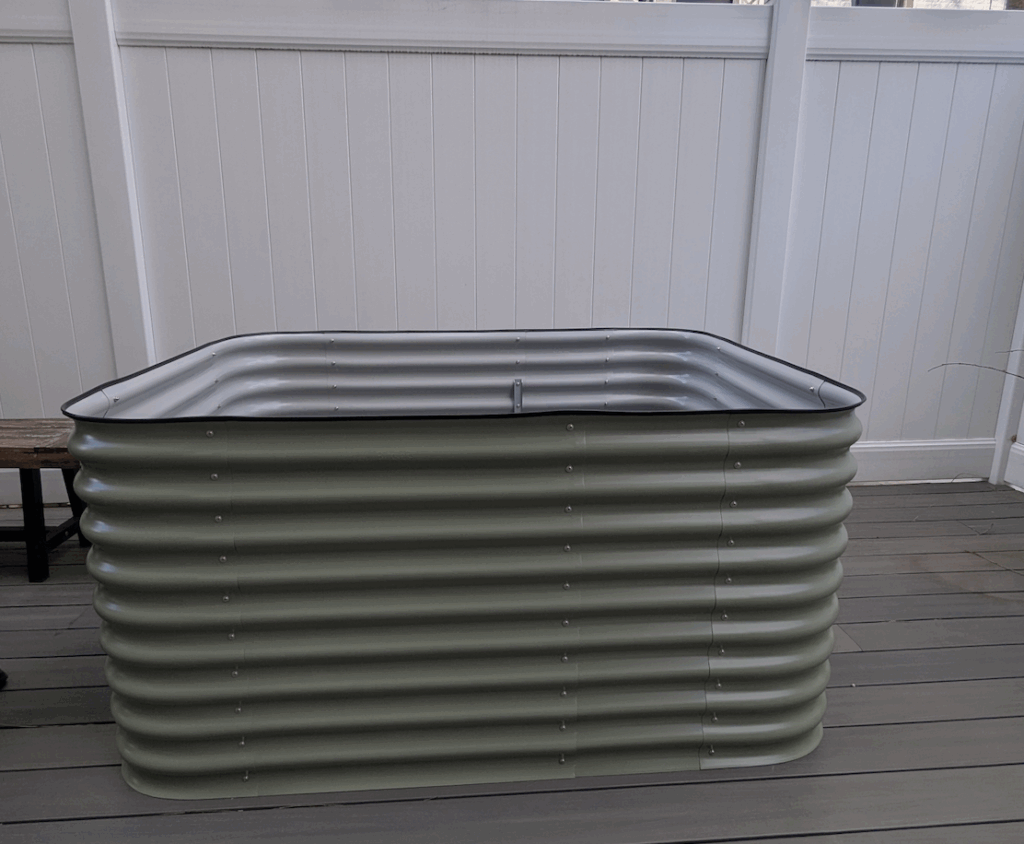
For my garden bed, I opted for a Birdies raised metal bed from Epic Gardening. I was torn between a metal and a cedar bed, but went for the metal version in the end. The nice thing about this one is that there are 5 shapes you can choose from, so it can work best for your space. It was really easy to put together as well.
Since I went with a raised bed, there was a lot of space to fill up. It can be super expensive to fill up a bed, so I wanted to be as smart as possible with how I approached it. I went with the Hugelkultur method, which layered logs and sticks at the bottom in order to take up about half the space. This was super handy because my neighbors just cut down a tree that was viable for me to use in the bed, so I asked if I could snag the logs from them. Over time, the thought is that nutrients from the logs will be added to the soil as they break down. In hindsight, using older wood probably would have been a better choice than the fresher ones I used, but it seems to work just fine.
The Soil
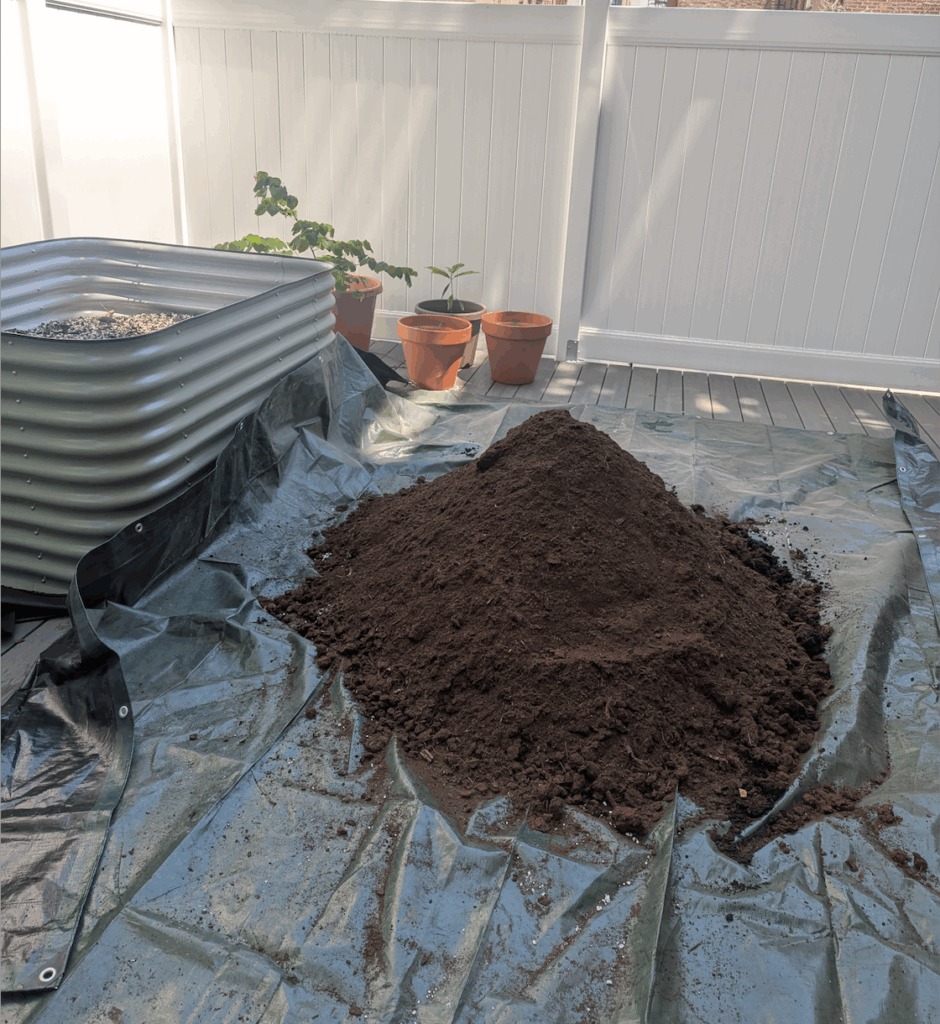
The soil formula I used followed Mel’s Mix: 1/3 coarse vermiculite, 1/3 peat moss and 1/3 compost. The theory behind this formula is that it will conserve water, create looser soil texture for plant root growth, and it will feed your plants the nutrients they need. Because I had to buy the ingredients individually, it did require mixing myself, which took some time and effort. But it seems to have worked really well! I did end up using only one form of compost though because it’s all I could find that wasn’t a million dollars, but it’s recommended to use different sources for optimal nutrients.
It definitely isn’t super cheap to fill up one of these raised beds, but the nice thing is you only have to do the bulk of the work once. So you won’t have to invest hundreds of dollars into the soil each year (hopefully).
The Plants
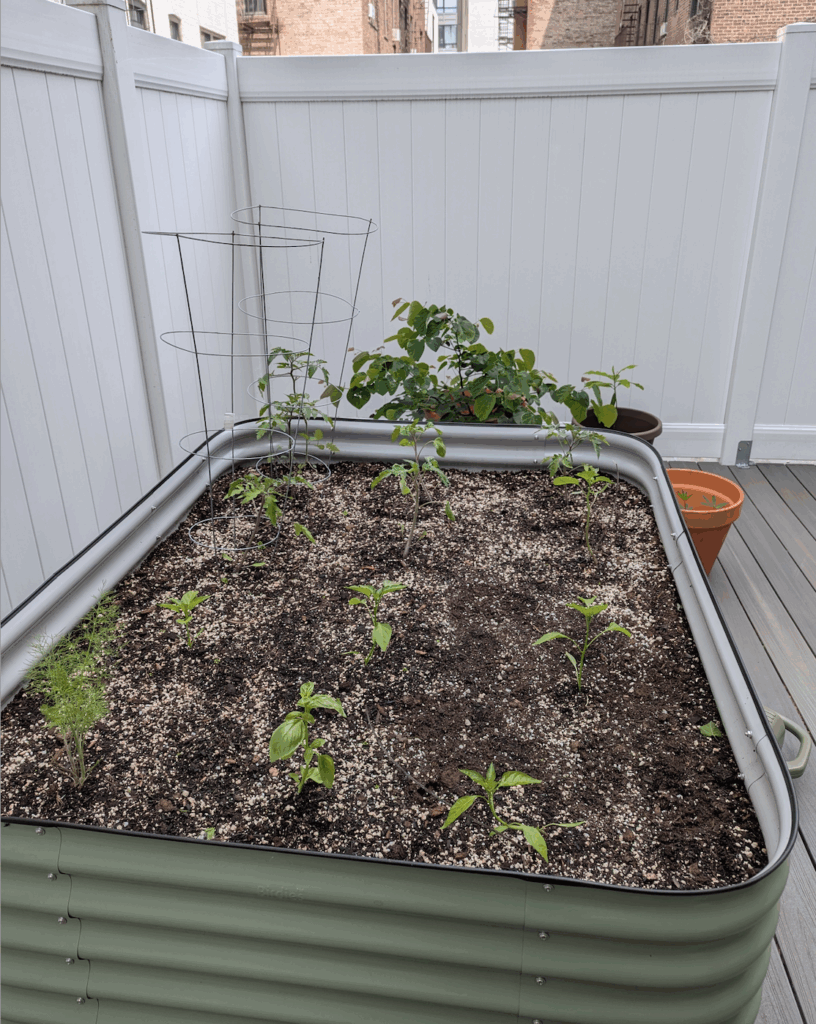
When deciding which plants to grow this year, I went with ones that I’ve loosely grown before and knew would be relatively easy to handle for my first year. I had a few varieties of tomatoes (Roma, heirloom, cherry), tomatillos, jalapeños, shishito peppers, Fresno peppers, dill, and basil.
Overall, the plants grew really well. The only one that struggled was the dill. I’m not sure if it just didn’t get enough sun or what, but it didn’t really get very big and it had a slightly strange taste.
The cherry tomatoes blew up and we’ve had a steady stream of them for quite some time. The shishito peppers also were a hit. They’ve been great to blister and serve up with some lemon and salt.

Some learnings that I had is that Fresnos need to turn red before you harvest them… I cut off two green ones before I figured that out. I also had a bit of blossom rot in my heirloom and Roma tomatoes. I plucked off the ones that were rotting on the bottom and upped how often I was watering. That seemed to have done the trick because I wasn’t getting as many issues after that.
Something I wasn’t very good at this year was thinning out the crops. As a result, my tomatoes BLEW UP. They took over the garden and spilled off to the sides as well. I’ve been trimming a lot recently and saw a huge improvement to the quality and size of the tomatoes growing now.
It’s been really fun to grow these plants myself and learn how to improve for next year. I also have really loved giving some of the plants I grew to friends. It’s so fun to share the wealth and see how much they like it all as well.
Future Plans
I have a lot of ideas for next year, which includes trying new plants like squash, carrots and broccoli. As well as trying out the same ones with the learnings I’ve gotten from this year. I will definitely be thinning out my tomatoes more next year and switching up the positioning for some of the plants I grow. I’m really excited to keep this up and see how much I can improve next year!
If you’re interested in starting a garden, but aren’t sure where to start, Epic Gardening has been a huge help for me. They have lots of YouTube videos and articles on their website that breakdown pretty much any subject you would want to know about.